
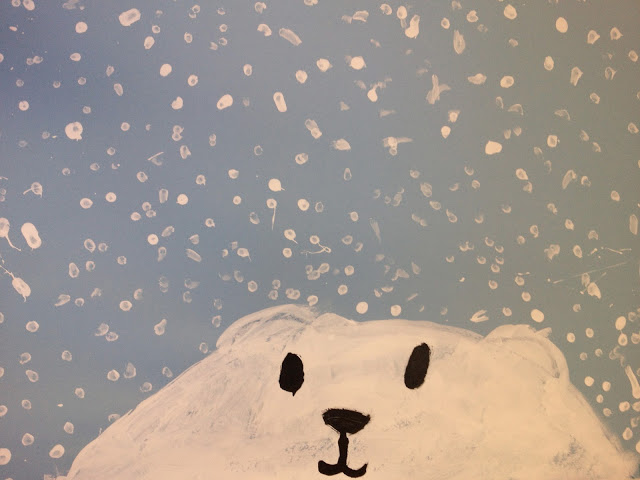

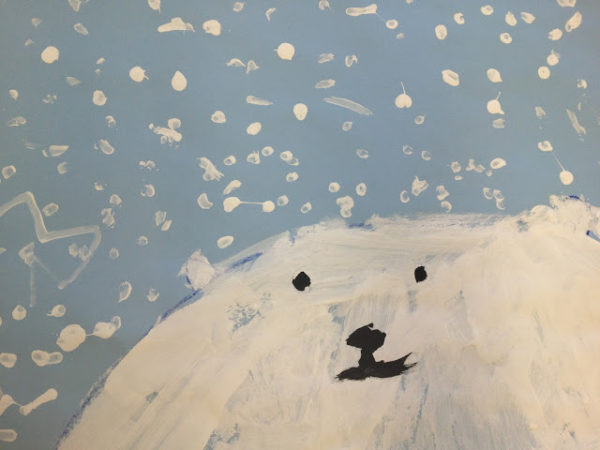
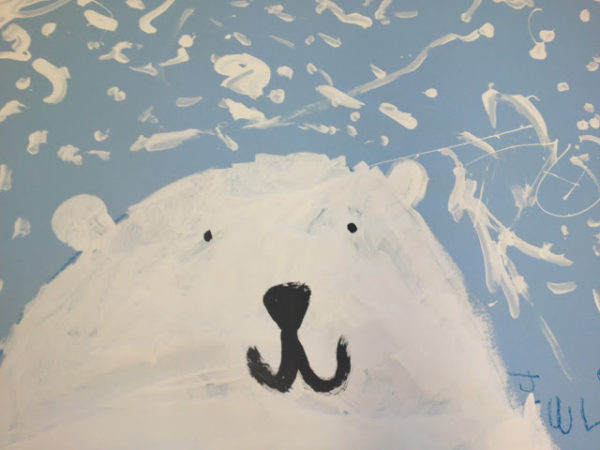
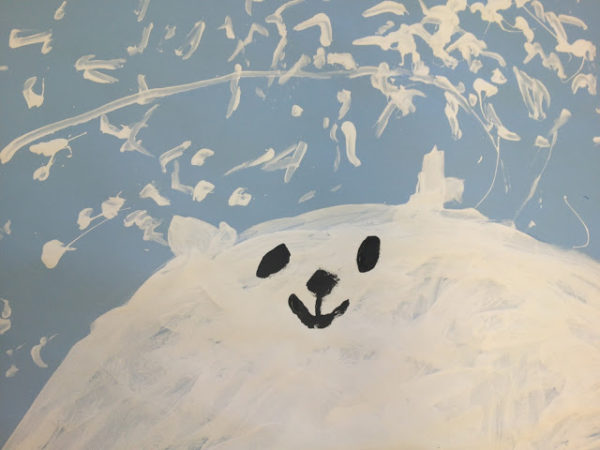
This was such a fun painting project. I ordered the largest size construction paper (24 x 36) in pale blue. This gave it the “wow” factor. I love large paintings! We drew the bears on the paper before painting. I gave the children crayons.
Step One: I had the children draw a half moon shape for the head of the bear. I told them to make it a big half circle. We practiced with our finger “pencil” first on the paper.
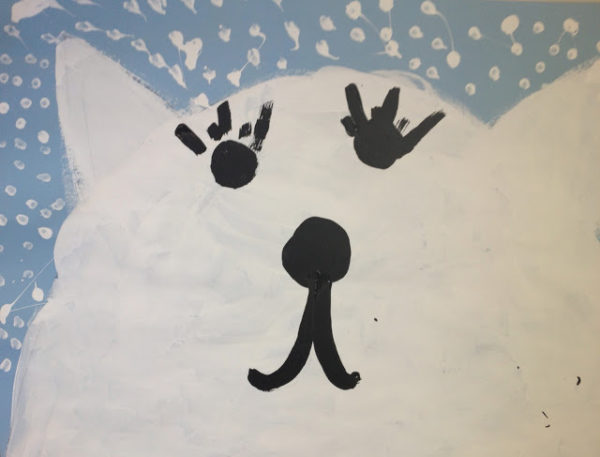
Step Two: Next, we drew the ears of the bear – half circles or ovals.
Step Three: Finally, we drew two dot eyes, an upside down triangle nose with a J shape coming down from the nose. Then a backwards J to make the other side.
Paint the bear white first. Let dry.
Paint the eyes and nose. Let dry.
Paint the storm with a q-tip. Done!
TIP: I taught the children to “dip, tap, paint.” Dip the brush into the paint, tap it against the side of the paint pot, and paint. Otherwise – you will have drips all over your paintings!


Super cute!!
?Teri
A Cupcake for the Teacher
Great job Sally!
Best,
Ramon
Fonts 4 Teachers
Fonts 4 Teachers in TPT
Are those ever cute!! Thanks for the great pics. Renee
🙂
They are the most beautiful painted polar bears I have seen. Ever. I can’t wait to do this with my boys! Thank you for being such an inspiration.
Kerrie
What really worked about this project is the way each bear turned out so lovely. Each bear seemed to fit the child’s personality. So wonderful when a project fits so many levels of development. I loved the huge paper too. You can’t tell in the photos but these are quite large.
I wish that there were more teachers out there like you. My son (6yrs) is schooled part-time (flexi-schooled) and he is so uninspired by school at the moment. He always ALWAYS comes home saying that he spent too much time in front of the interactive white board doing worksheets. If you were in my sons school (in the UK) I would fight every year to have you the following year! What you are doing is just amazing. Everything I look at is just so wonderful, it gives me the courage to provide him (on the 4 days that he is at home) with what he isn’t receiving creatively at school. Many thanks again!
I encourage you to provide the creative view at home. There were many years I told people “my children go to public school and I home school them.” Often times – public education was not enough.
Do take heart – there are so many amazing teachers out there – I have talked and witnessed so many doing the right thing for children. AND it is a difficult time in the educational systems to do the right thing.
Thank you for stopping and I would love to chat some time!
I would love to feature this idea on my blog if it is okay with a link back to you. I am going to do this in my first grade class this week, but would love to post your idea PRIOR to my kiddos doing it. 😀
Please let me know.
~Nikki T
Smart Tarts Learning
Absolutely! I would be delighted.
Hooray! I just love your blog and ideas. 😀
~Nikki T
Smart Tarts Learning
Hi Sally! I added your wonderful polar bear art activity to my blog post about polar bears. 🙂 THANKS and I can’t wait to do it with the kiddos on Friday. Here is the direct link for your review: http://smarttartslearning.blogspot.com/2013/01/polar-bear-polar-bear-what-do-you-hear.html
~Nikki T
Smart Tarts Learning
I am so thrilled and can hardly wait to see! Hugs!
thanks for share...
Thank you so much for this great idea. I did it in a smaller paper with my art class. It turns out so cute.