

Last week I taught two classes for a new local museum. My featured projects for both days – little habitats. I have rarely seen a child who does not adore the task of creating a miniature world. There is this amazing ability of a little world to pull the storyteller out of children. I love to have the children write stories about their villages. It is a rich and wonderful process.
In my kindergarten – I set up making these during Work Stations. I would often put these in my Literacy Station. The children would create the village and then write a story to go along with it.
Materials:
cake boards (ask your local bakery for a donation or purchase at Michael's)
foam snowflake stickers (on sale now 75% off at Michael's)
small white bags (Michael's)
construction paper
white card board
markers
white foam clay (use 40% off coupon at Michael's)
Snow paint: 1 squirt of shaving cream, 1 squeeze of white paint, 1 squeeze of school glue (mix together in dixie cup)
Preparation: I prepare the bag houses by stuffing them with a bit of newpaper and stapling on a construction paper roof.
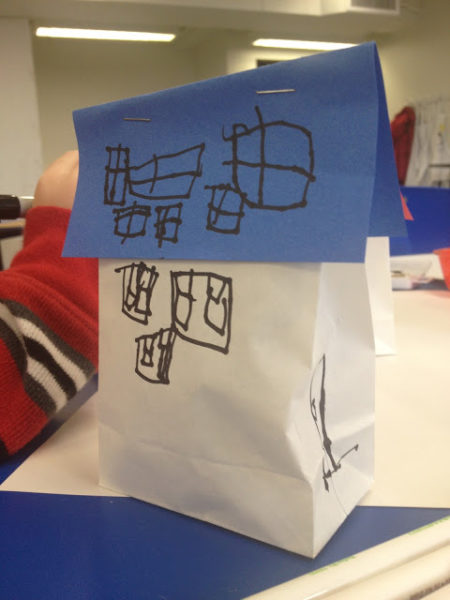
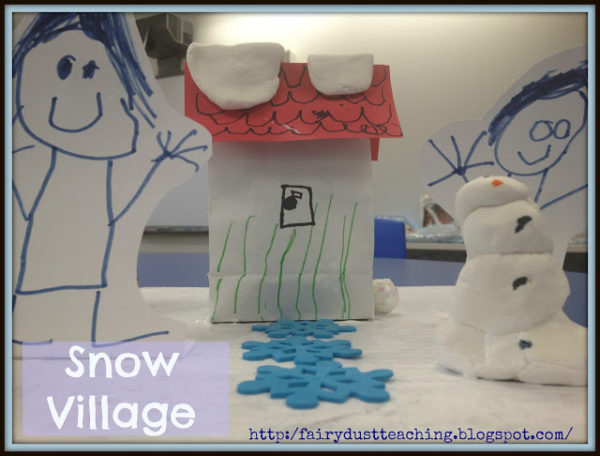
STEP ONE: With markers, decorate your houses. Add windows, doors, and more!
(Tip: These are art houses – be creative!)
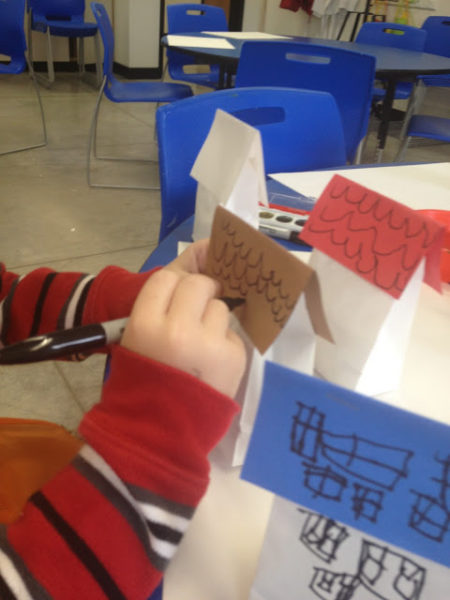
Decorate all of your houses.
STEP TWO & THREE:
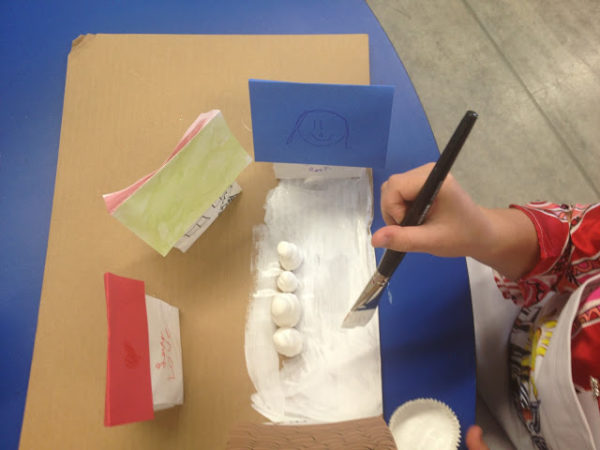
Glue the houses on your board where you would like them to be. (Important! Use the side that is the basic brown cardboard – so the paint will stick.)
Paint the ground with “white snow paint.”
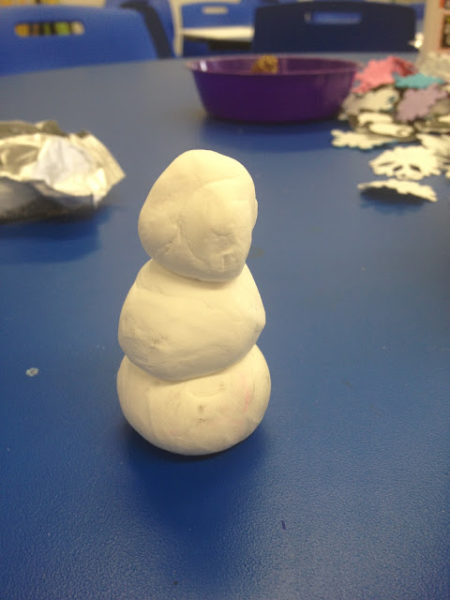
STEP FOUR: Make snow people! Roll three balls of foam clay on top of each other! Easy peasy.
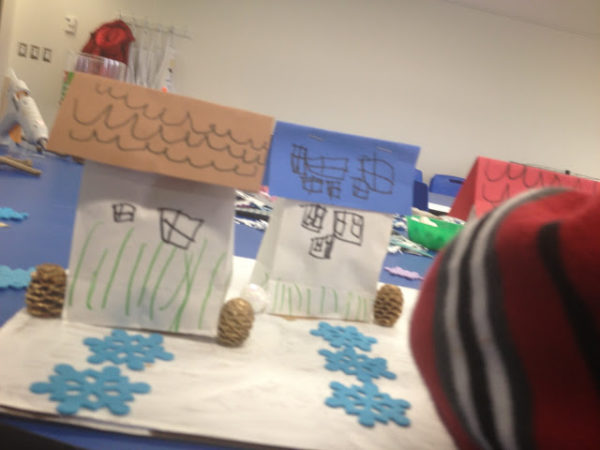
STEP FIVE: Put snowflake stickers where you would like on your board. They make great pathways.
Add pinecones and sticks for extra detailing if desired.
(I came around with my glue gun and did the gluing of the bigger objects.)
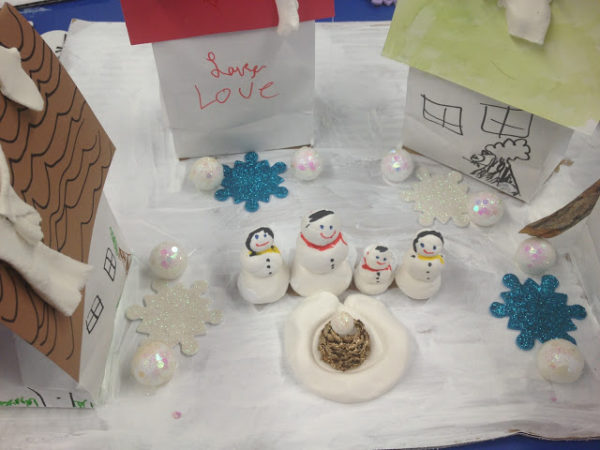
STEP SIX: Add faces and details on your snow people with markers.
(I found the coolest glitter balls at Michael's in the Christmas decorations on sale.)
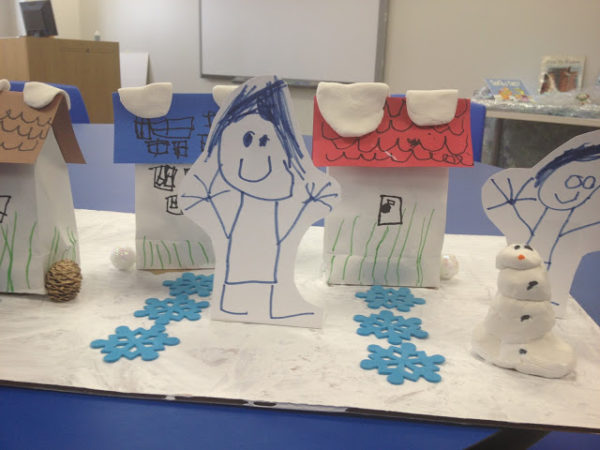
STEP SEVEN: Draw people for your snow village on white card stock. Cut out and fold down the bottom to make a tab. Glue to board.
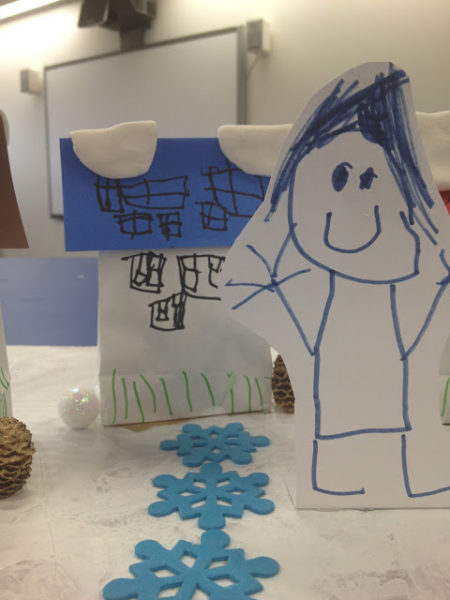
STEP EIGHT: Name your village.
“Snowball Village”
Write a story about your village:
“Once upon a time there were two boys – me and my brother. We had a snowball fight. The snowball hit my brother Chris. He cried.”
Here is more inspiration on Snow Village constructions: Snow Village from Nurture Store

This is adorable! I’m going to do this with my K class when we go back next week. Thank you for sharing!
It is one of those highly engaging activities. The little boy who did the “Snowball Village” said at one point – “I am so tired but I can’t stop!” Sums it up!
At first glance, the snowman looks like a marshmallow creation (which would be messy but yummy)! This is a great activity!
ReadWriteSing
LOL! I just looked with new eyes and you are so right! They do look like marshmallows! Check out the link I put up from Nurture Company – Cathy did a cotton ball snowman that would work well and is adorable.
I LOVE this! Thank you so much. I’m going to do this with my Grade ones. I can’t quite tell from your pics, but is it a communal village or individual?
Happy new year!
Barbara
Grade ONEderful
Ruby Slippers Blog Designs
These were individual villages. I have also created a community village. It works either way!
Happy New Year!