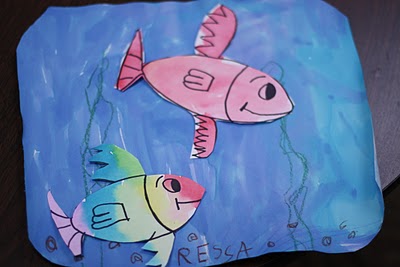
This is such a simple drawing project with great results. We drew the fish for Dr. Seuss week – for “One Fish, Two Fish.” Use black sharpies to draw the fish and watercolors to decorate.
Step One: Draw a long oval. Add a circle for an eye. Draw the pupil.
Step Two: Draw a curved lined from the top to the bottom of the fish's body. Add a smile.
Step Three: Add the top fin using a curved line or zigzag lines.
Step Four: Add curved lines or zigzag lines to the bottom of the fish. Add a triangle to the back of the fish with the point of the triangle touching the fish.
Step Five: Add lines inside the triangle.
Step Six; Watercolor the fish.
Step Seven: Cut out fish and glue to construction paper that has been washed with watercolor. I had the children decorate the paper first in crayon.


I really love the focus you have in your class on drawing. It is so empowering for the children!! I have been trying many of your lessons with my 4 year old and the Munchkin is LOVING it. Especially the castle….but I have a feeling the fish will be a hit too. 🙂 Thanks!!
These are so cute! Just plain fun!