
For my toddler's birthday this year, I decided to make him a sensory table inspired by Tom Bedard!
I didn't really know how this would turn out since I was attempting to create this with items I had on hand, except for the bag of beans. However, I was pleasantly surprised when it turned out amazing and it only took me about 30 minutes to create!
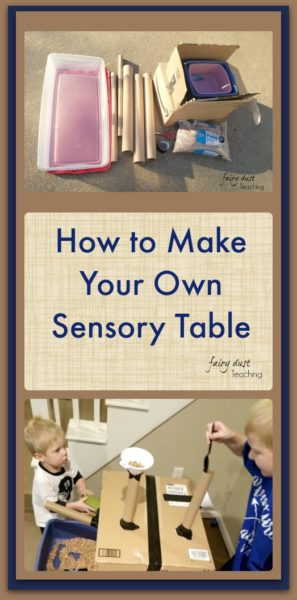
What You'll Need
- A box or 2
- A large plastic bin
- Several cardboard tubes (various sizes)
- A few small plastic bins
- Scissors
- Duck Tape
- Various items for pouring: cups, spoons, ladels, etc…
- A drill (optional)
- Funnels (optional)
- Hand saw (optional)
- Sensory item such as dried beans, play sand, or rice
- For this table, I purchased a 20 lb bag of dried pinto beans for around $11 at Wal-Mart
The Process
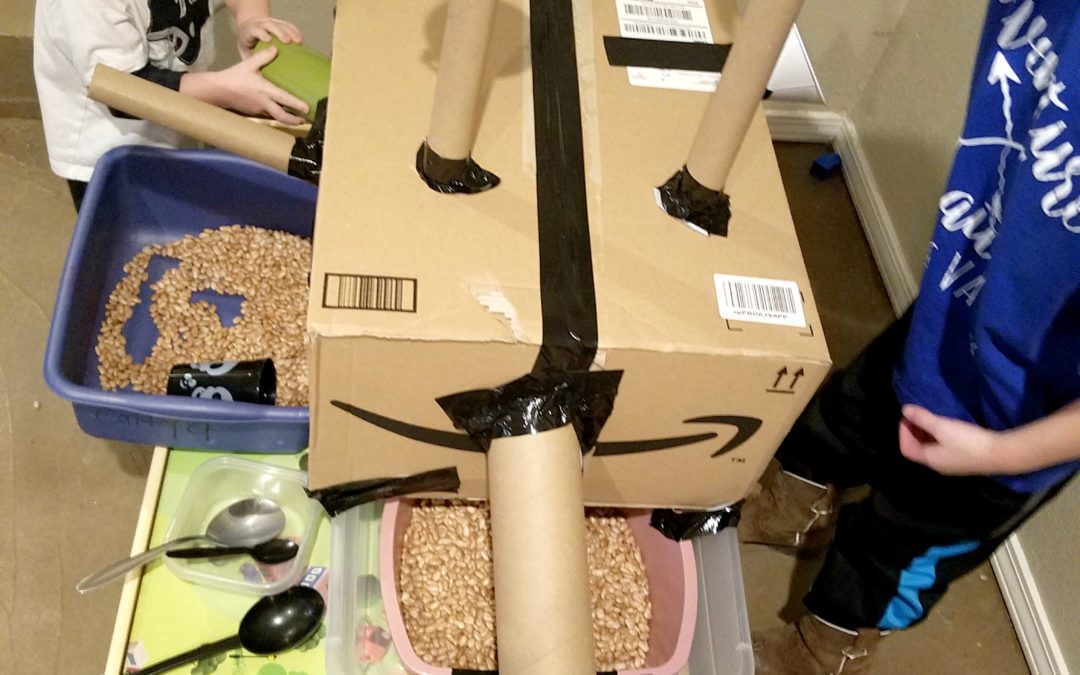
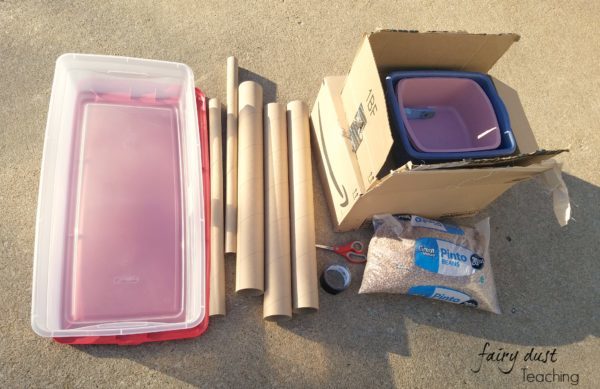
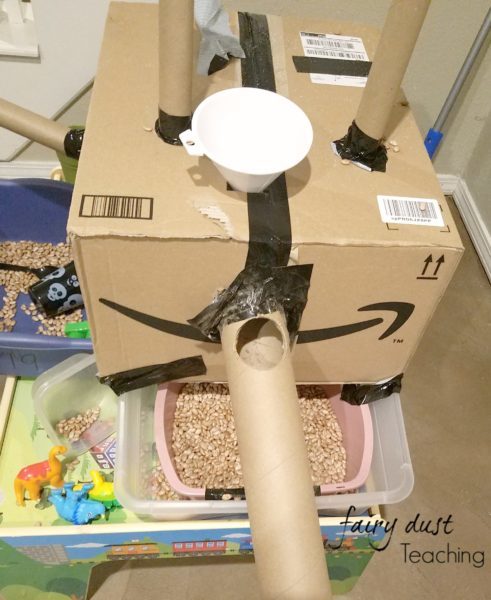
I began by cutting various square-shaped holes on the sides of the box and a round hole where I put a large cardboard tube.
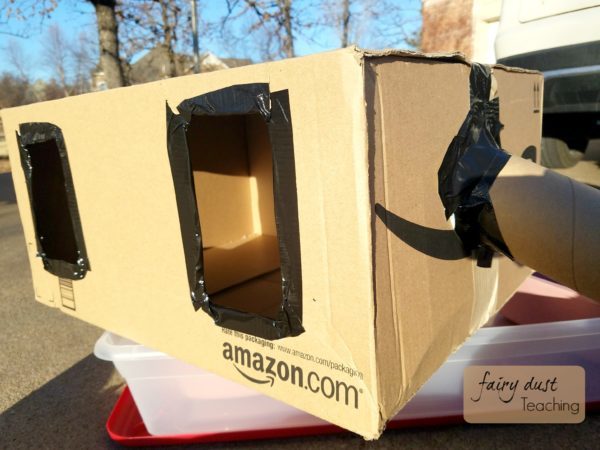
I made sure to line the rough edges of the holes with Duck tape. This will keep from scratching up my baby's delicate skin.
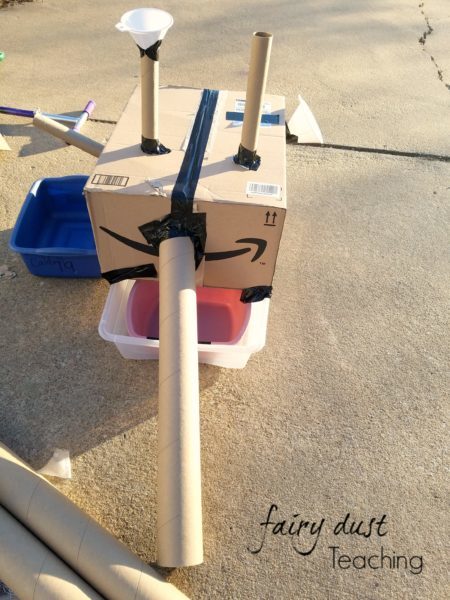
I simply played around with placing the materials I had in various places that might be interesting to a toddler who loves to pour, scoop, and transfer.
I also taped the box and smaller bins to the larger plastic bin to prevent sliding.
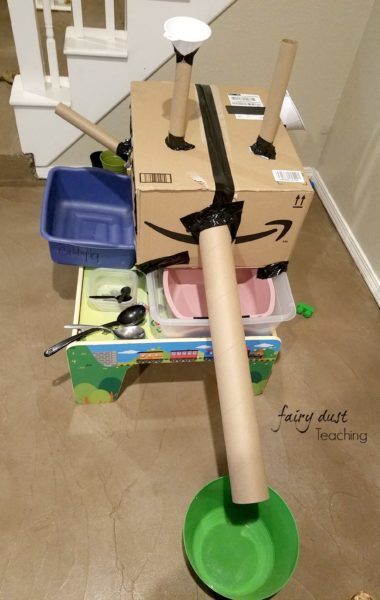
The thing I love most about Tom Bedard's sensory tables are that he adds various levels to the tables which furthers exploration. When I brought the table inside, I placed it on top of my LO's train table and placed a bucket below the cardboard shoot to catch sliding beans. This created 3 levels to the table: the floor, the base, and the top.
Sensory Play
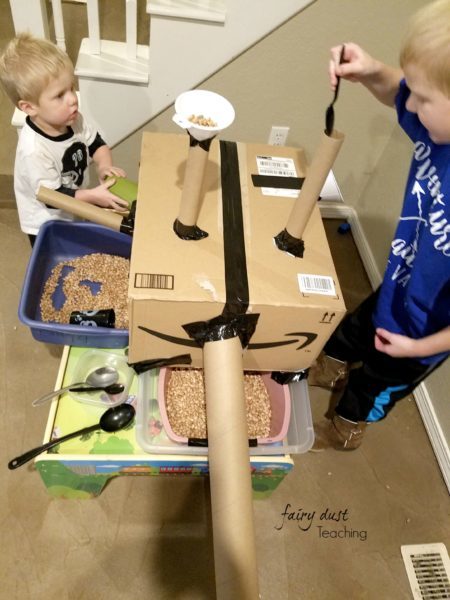
I poured the beans into the various plastic bins and let the boys go to town.
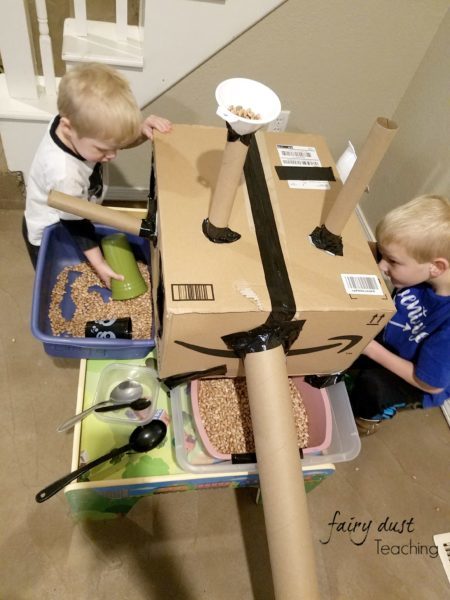
This was intended as a birthday gift for the toddler, but as you can see, the 6 year old was just as fascinated with it. They scooped and poured and searched for where their beans were ending up.
*Note the beans stuck in the funnel…we'll address that soon.
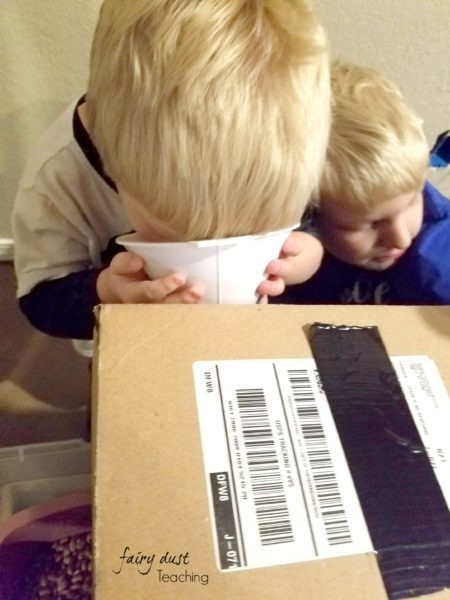
It even made really cool noises when they talked into the funnel. I so love sensory exploration!
The Modifications
I must note that after watching the boys explore the table for about 30 minutes, I noticed some ways the table could be modified to further their play experience.
- I had my husband drill a hole in the large cardboard tube so they could either pour directly into it or watch the beans sliding down.
- I used a hand saw to cut the funnels down where the holes were wider so the beans would not get clogged up in them.
- Finally, I untaped the funnels so that the boys could move them whereever they wished to use them.
Reflections
This table was so super simple to make and has provided so much fun for my boys! Since I used items I already had on hand, I only spent $11 for a birthday gift that will keep on giving!
What's he learning?
- Hand/Eye Coordination
- Problem Solving
- Engineering
- Cause and Effect
I would love to hear from you!
How do you encourage sensory play?
What is your favorite sensory exploration material?
Tom Bedard
As I said in the beginning, this sensory table was inspired by the amazing Tom Bedard. He was a featured speaker in Fairy Dust Teaching's 2016 Summer Conference and I was blown away by his sensory table creations! I encourage you to check out his website here: http://tomsensori.blogspot.com/
Follow Fairy Dust Teaching's Pinterest board for more Sensory Table Ideas!
https://www.pinterest.com/fairydustteach/water-table-activities/


Jenni,
Thank you for your post. I too, love Teacher Tom’s sensory ideas, he is so creative. Your step by step process has given me the confidence that I could create something too. This is a wonderful budget friendly way to provide so many developmental learning opportunities for young children. Your boys are so fortunate to have a creative Mom. Thank you so much for the post!!